
Complete Outdoor Living Systems
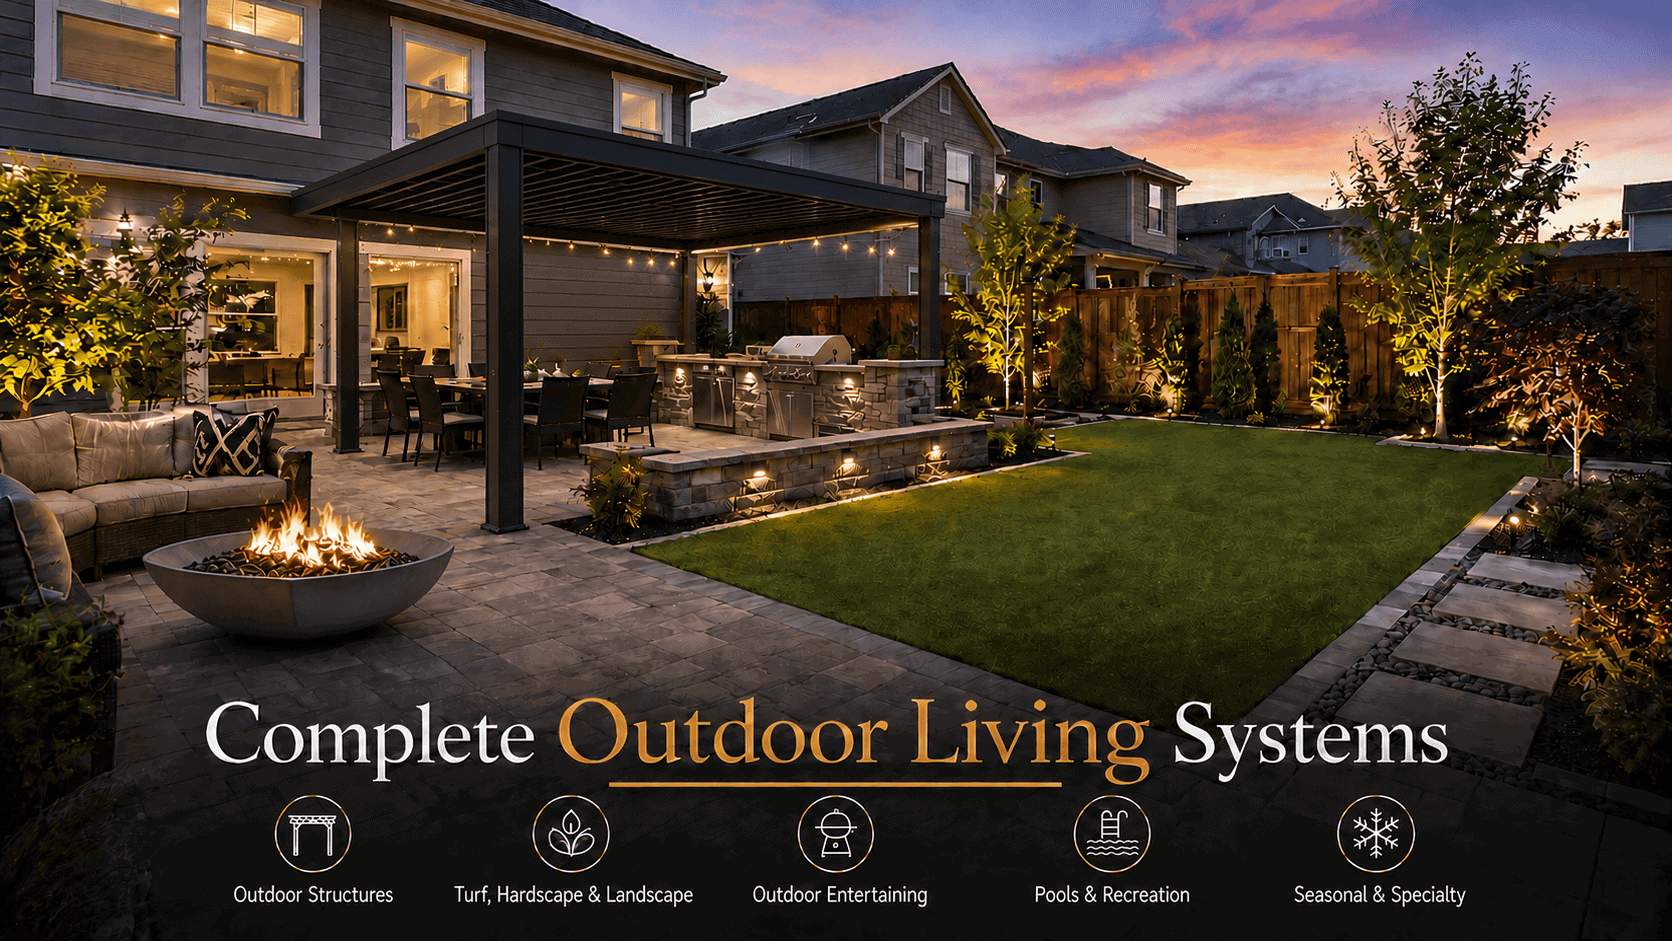
Most backyard projects start with a single thing the homeowner wants to fix: too much sun, no place to cook outside, a deck that is falling apart, a yard the dog has destroyed. That single fix leads to a project. The project leads to a space that works better than it did. Six months later, the homeowner realizes that the new pergola would be more useful with side screens, that the patio needs lighting to be usable after dark, and that the outdoor kitchen now under consideration would require running a gas line across the yard that was just landscaped.
The pattern is common — homeowners building outdoor spaces one decision at a time, discovering only after each phase that the next improvement requires undoing or working around the last one. It is not a failure of imagination. It is the predictable result of treating individual components as separate projects rather than understanding how they work together as a system.
This guide exists to prevent that pattern. Whether a project starts with a blank slate or inherits a yard with existing features, the goal is to think about the outdoor living space as a complete environment — one where every structure, surface, enclosure, and utility connection supports the others, and where the order of construction matters as much as the components themselves.
What a complete outdoor living system actually means
A complete outdoor living system is not a checklist of products. It is a designed environment where the overhead structure, the ground surface, the perimeter treatment, the utility infrastructure, and the lighting work together so the space is comfortable and functional across the widest possible range of conditions — time of day, season, weather, and type of use.
Outdoor comfort is a systems problem, not a product problem. A pergola solves overhead sun. It does not solve wind, insects, muddy ground, a dark patio after sunset, or the lack of anywhere to prepare food without going inside. Each of those problems has a specific solution, and those solutions interact physically, aesthetically, and logistically.
The five layers of an outdoor living environment
Every functional outdoor space is built from five layers. Not every space needs all five, but understanding what each layer does supports intelligent planning — whether everything is built at once or the project is phased over years.
1. Overhead structure. This is what defines the space and controls sun, rain, and sky exposure. In most residential outdoor living environments, this is a pergola with a motorized louvered roof — a structure that can open fully to the sky or close completely to shed rain. The overhead structure is the architectural anchor of the space. Everything else — screens, lighting, fans, heaters — attaches to it or relates to it spatially.
2. Ground surface. The material underfoot determines the feel, durability, drainage, and maintenance of the space. The primary residential options are interlocking pavers, composite decking, artificial turf, and poured concrete — each with different structural requirements, aesthetic characteristics, and integration considerations with overhead structures and adjacent landscaping. The ground surface is the first thing installed in most outdoor projects because everything else sits on it.
3. Perimeter treatment. This is what defines the edges of the space and manages wind, privacy, insects, and visual enclosure. The options range from composite fencing for property-line privacy to motorized zip screens mounted within a pergola frame for on-demand enclosure to glass railings on elevated decks that preserve sightlines while meeting code. Many complete outdoor spaces use multiple perimeter treatments — fencing at the property line, glass railing at the deck edge, zip screens within the pergola.
4. Utility infrastructure. This is the invisible layer — the gas line for the outdoor kitchen, the electrical circuits for the motorized roof and screens, the low-voltage wiring for landscape lighting, the plumbing for a sink, the control wiring for permanent roofline lighting. Utility infrastructure is the layer most likely to create problems when it is not planned before the visible layers are installed — running a gas line under a newly installed paver patio is expensive and destructive.
5. Shade and weather supplements. These are the components that fine-tune comfort: retractable awnings for sun angles the pergola does not fully cover, infrared heaters for shoulder-season evenings, ceiling fans for air circulation under a closed louvered roof on humid days. These supplements typically require infrastructure (electrical circuits, structural mounting points) that needs to be planned during earlier phases even when the components are not installed immediately.
Why installation order matters more than component selection
This is the most expensive lesson in outdoor living, and most homeowners learn it after the fact: the sequence of installation determines whether a project comes together efficiently or requires costly rework.
The correct general sequence
Utility rough-in comes first. Before any visible work begins, underground utilities — gas, electrical conduit, low-voltage lighting wire, plumbing — should be trenched and stubbed to their destination points. This is the work that is cheapest to do when the ground is open and exponentially more expensive to retrofit once surfaces are installed.
Ground surfaces come second. Pavers, concrete, or deck framing provide the platform everything else sits on. Structural footings for pergola posts, where they integrate with the ground surface, need to be coordinated with this phase.
Overhead structures come third. The pergola or shade structure installs onto the prepared surface and footing system. Electrical and control wiring for the motorized roof, integrated lighting, and future screen installations should be pulled through the frame during assembly — not retrofitted later.
Perimeter and enclosure come fourth. Fencing, zip screens, glass railings, and privacy treatments install once the structural frame is in place and the spatial boundaries are defined.
Finish elements come last. Kitchen equipment, furniture, landscape lighting fixture placement and aiming, permanent roofline lighting, audio systems, and decorative planting complete the space.
What happens when the order is wrong
The most common sequencing mistakes:
Installing a paver patio, then deciding six months later to add a pergola — which requires cutting through the finished pavers to pour footings, then repairing the cut areas with patches that never quite match.
Building a beautiful deck, then realizing the planned outdoor kitchen requires a gas line that would have been trivial to run before the deck framing went in and now requires either routing across the yard above ground or tearing up a section of the new deck to access the crawl space.
Installing landscape lighting, then adding fencing that blocks the fixtures’ sight lines and requires reinstalling half the system.
The solution is not necessarily building everything at once — phasing is practical and often financially necessary. The solution is planning for the complete environment at the beginning, even when only the first phase is built now. Stubbing a gas line and pulling electrical conduit during Phase 1 costs a fraction of a Phase 3 retrofit.
How outdoor structures and systems work together
One of the most useful things a homeowner can understand before designing an outdoor space is how the components interact — physically, functionally, and aesthetically. The major systems relate to each other as follows:
Pergola + outdoor kitchen
The pergola defines the overhead space; the outdoor kitchen defines the functional core. In a well-designed outdoor living room, the kitchen island is positioned under the pergola’s coverage area, with the louvered roof providing shade during cooking and a watertight seal when weather arrives. The pergola frame also provides the mounting structure for task lighting over the cooking zone — integrated LED strips in the louver system or dedicated downlights mounted to the beam.
The coordination requirement: the gas line for the kitchen grill and the electrical circuit for the refrigerator and ventilation need to reach the kitchen island location without crossing the pergola’s footing positions. This is a layout problem that needs to be solved on paper before any ground is broken.
Deck + glass railing + lighting
An elevated composite deck creates the platform. Glass railings preserve the view from the elevated position while meeting code height requirements. Landscape lighting at the deck perimeter, step lights in the stair risers, and post cap lights on the railing system create a nighttime environment that is both functional and visually dramatic. The coordination requirement: the deck framing needs to accommodate the glass railing post mounting system (which typically requires specific blocking in the rim joist or fascia), and the low-voltage lighting wiring needs to be routed through the framing before the decking boards go down.
Artificial grass + pavers + fencing
A common configuration for families: artificial turf in the main play and pet area, a paver patio adjacent to the house for dining and entertaining, and composite fencing at the perimeter for privacy and to contain pets. The coordination requirement: the turf-to-paver transition needs a clean edge restraint system, the paver base and the turf sub-base need compatible drainage slopes, and the fence post footings need to be installed before either surface is completed to the property line.
Permanent roofline lighting + landscape lighting
These are two separate systems that create one unified nighttime picture. Permanent roofline lighting defines the architectural silhouette of the house from the street. Landscape lighting illuminates trees, garden beds, walkways, and the outdoor living space itself. Both are low-voltage LED systems, but they use different fixtures, different control systems, and serve different aesthetic functions. Planned together, they complement each other — the house glows from above while the landscape is sculpted by light from below. Planned separately, they often compete visually, with conflicting color temperatures and redundant coverage.
Batting cage + turf + lighting
For athletic families, a backyard batting cage or training net system transforms unused yard space into a year-round practice facility. The turf surface underneath provides consistent footing and ball response. Dedicated lighting extends practice into evening hours. The coordination requirement: the cage’s structural posts and anchoring system need to be integrated with the turf installation plan, and the lighting positions need to account for the netting height to avoid casting shadows across the hitting zone.
Expandable homes + site integration
An expandable container home adds living square footage to a property — for rental income, multigenerational family use, or a dedicated workspace. The coordination requirement with the broader outdoor living environment: the unit’s placement affects yard layout, utility routing, and the visual relationship between the primary residence and the outdoor living space. A well-planned site integrates the unit with shared outdoor areas — paver walkways connecting the two structures, landscape lighting that encompasses both, and fencing that creates private outdoor space for the occupant without isolating the unit from the property’s overall design.
Phasing a project without painting the space into a corner
Building a complete outdoor living system in a single project is the most efficient approach — one design, one mobilization, one permit cycle, and no rework. It is not always financially realistic. Phasing a project over two, three, or even five years is practical as long as the phases are planned together from the start.
A practical three-phase approach
Phase 1: Foundation and infrastructure. Install the ground surface (pavers, deck, or turf), pour pergola footings (even when the pergola does not go up yet), and rough in all underground utilities — gas, electrical conduit, low-voltage lighting wire, and plumbing — to their future destination points. Cap and mark the stubs. This phase creates a usable outdoor space immediately — a patio or deck ready for furniture — while ensuring that every future addition connects cleanly without demolition.
Phase 2: Structure and enclosure. Install the pergola on the pre-poured footings, connect the pre-run electrical for the motorized roof and integrated lighting, and add perimeter elements — fencing, zip screens, or glass railings. This phase transforms the flat surface from Phase 1 into a defined, comfortable outdoor room.
Phase 3: Kitchen, lighting, and finish. Install the outdoor kitchen using the pre-run gas and electrical, mount the landscape lighting fixtures on the pre-run low-voltage cable, add permanent roofline lighting to the house, and complete any remaining elements — heaters, audio, decorative features. This phase adds the functionality and atmosphere that make the space a genuine extension of the home.
What to stub even years before it is used
The items that cost little to install during ground work and a great deal to retrofit:
A capped gas line to the future outdoor kitchen location. An electrical conduit from the house panel to the future pergola footing location. A low-voltage wire run from the transformer location to the far corners of the yard. A water supply and drain line to the future sink location. Blocking or mounting hardware in the deck framing for the future glass railing posts. A conduit path from the house soffit to the transformer for future permanent roofline lighting.
A contractor who questions utility stubs to a location where nothing is being built yet is a contractor who does not think in systems. The stub is a minor line item while the ground is open; the retrofit is a major one after the surfaces are finished.
The investment: what drives complete outdoor living system cost
Outdoor living costs vary enormously with scope, materials, site conditions, and market. A single quoted number would be misleading; the useful frame is which components carry the cost and what drives each.
Where the cost concentrates
Ground surfaces are the largest area components, so square footage drives their totals — with material selection and pattern complexity setting the rate for pavers, and substructure requirements doing the same for composite decking. The overhead structure is typically the largest single line item; size, the motorized louver feature set, and site complexity drive it. An outdoor kitchen’s cost is driven as much by the utility runs — gas, electrical, plumbing — as by the equipment itself. Lighting systems scale with fixture count and wiring distance. Perimeter treatments scale with linear footage, with glass railing carrying a substantially higher per-foot rate than composite fencing.
How to think about the investment
Scope drives the spread. A modest but complete environment — a paver patio, a mid-size louvered pergola, basic landscape lighting, and a simple outdoor cooking setup — sits at one end; a full-scale outdoor living room with a large pergola, zip screens, a complete outdoor kitchen, a glass-railed composite deck, and professional landscape and permanent lighting sits at the other, at a multiple of the modest configuration’s cost. A site assessment converts the framework into a scoped figure for a specific property.
The National Association of Realtors’ 2023 Remodeling Impact Report: Outdoor Features estimates 95 percent cost recovery at resale for a new concrete paver patio — among the highest-returning outdoor investments the report tracks — and notes that outdoor spaces consistently rank among the features buyers find most appealing. The more meaningful return for most homeowners is not financial: a well-designed outdoor space extends the home’s functional square footage at a fraction of the per-square-foot cost of an interior addition.
How climate shapes the outdoor living plan across markets
The systems approach applies everywhere, but the specific configuration — which components matter most, which features are essential versus optional, and what engineering specifications are required — varies significantly by climate zone.
Year-round outdoor markets: Naples and Orlando
In Central and Southwest Florida, outdoor living space is daily infrastructure, not a seasonal amenity. The primary design challenges are heat management, insect pressure, and afternoon rain events, which makes the overhead structure (louvered pergola) and the enclosure system (zip screens with insect mesh fabric) non-negotiable components rather than add-ons. Coastal work in Naples calls for corrosion-resistant hardware specified for salt air exposure, and hurricane wind design drives structural engineering decisions that inland properties do not face.
Extended-season markets: San Antonio and Denver
San Antonio offers a long outdoor season with intense summer heat that makes overhead shade and ventilation control essential. Denver’s Front Range weather transitions quickly — a warm afternoon can hand off to a cold evening — which rewards a space that adapts: louvered roofs that open for mild conditions and close for weather, zip screens that manage wind, and heaters that extend evening use into the shoulder seasons. Colorado frost-depth requirements also shape footing specifications for any permanent structure; the governing values for each jurisdiction are covered on the individual market pages.
Defined-season markets: Romeoville and Secaucus
The Chicago suburbs and northern New Jersey run true four-season climates with snow load, freeze-thaw cycling, and a compressed outdoor season. The outdoor living investment there is about maximizing the usable months — extending the spring start and fall finish through enclosure and heating — and ensuring every component is engineered for winter conditions: pergola systems rated for the snow loads the local jurisdiction assigns, and paver base preparation that accounts for frost heave. The phasing question is especially relevant where the construction window is shorter, so multi-phase projects need to align with seasonal scheduling.
The mountain shoulder market: Colorado Springs
Colorado Springs combines Front Range sunshine with higher elevation, wider temperature swings, and greater wind exposure along the corridor. UV exposure intensifies with altitude, making material fade resistance a primary specification concern for fabrics, composites, and finishes. The outdoor living plan there prioritizes wind management (zip screens), UV-resistant materials, and structural engineering that accounts for both wind uplift and snow accumulation.
Permits, HOAs, and what to sort out before design
Before investing in design, two regulatory conversations need to happen.
Building permits
Most municipalities require permits for structures (pergolas, decks), utility work (gas, electrical, plumbing), and fencing above a certain height. The specific requirements vary by jurisdiction, but the general principle is consistent: work that involves structural load, utility connections, or setback calculations requires a permit and inspection. The permit process adds time that varies by jurisdiction, and it protects the homeowner by ensuring the work meets code — and by documenting the improvements for insurance and resale purposes.
In a phased project, each phase may require its own permit cycle. Planning the phases to align with permit scope — all ground work and utility rough-in in one permit, all structural work in a second — can streamline the process.
HOA requirements
In communities with homeowner associations, architectural review approval is typically required for any visible exterior change — and most outdoor living components are visible. The key variables: material and color restrictions, height limits, setback requirements, fence style mandates, and lighting restrictions (many HOAs limit or prohibit permanent color-changing lighting on rooflines). Filing for HOA approval early — before committing to a specific design — prevents the costly scenario of designing a space the association will not approve.
The design conversation: working with a contractor who thinks in systems
The most important thing to evaluate when choosing a contractor for a complete outdoor living project is not the portfolio of individual products — it is whether the contractor thinks about the space as a system. A contractor who installs pergolas can build a great pergola. A contractor who designs outdoor living environments asks about cooking plans, lighting preferences, future phases, utility access, and the wind patterns on the property before recommending any specific product.
Here is what a systems-level design conversation covers that a product-level conversation does not:
Use patterns. When is the space used? Morning coffee? Evening entertaining? Weekend cooking? All-day family use? The answers determine orientation, shade positioning, lighting design, and kitchen placement.
Adjacency to the house. Which room opens to the outdoor space — the kitchen, the living room, a bedroom? The transition between inside and outside should feel natural, and the indoor-adjacent function often drives the outdoor layout: when the indoor kitchen opens to the patio, the outdoor cooking zone should complement it, not duplicate it directly outside the door.
Multi-year vision. Even when budget only allows Phase 1 this year, the contractor should understand the complete vision so that everything installed now supports what comes later. This is the conversation where utility stubs, footing placement, and wiring paths get planned.
Maintenance reality. A beautiful outdoor space that requires constant maintenance is a space that gradually stops being used. Material selections — composite over wood, aluminum over steel, artificial turf in the pet area — should reflect the homeowner’s realistic maintenance commitment, not an idealized version of it.
Frequently asked questions
What drives the cost of a complete outdoor living system?
Total square footage, material specification, the number of utility connections required, and site complexity. A modest but complete setup — paver patio, louvered pergola, basic lighting, and a simple outdoor cooking area — sits at the low end of the range; a full-scale outdoor living room with a large pergola, zip screens, a complete outdoor kitchen, a glass-railed composite deck, and professional lighting runs to a multiple of that. A site assessment produces a scoped figure for a specific property.
What should be built first when everything cannot be done at once?
Start with ground surfaces and underground utility infrastructure. Install the paver patio or deck, pour footings for the future pergola, and rough in underground utilities — gas, electrical conduit, low-voltage wire, and plumbing — to their future destination points. That produces a usable outdoor space immediately while ensuring every future addition connects without demolition or rework.
Is a permit required for outdoor living improvements?
In most jurisdictions, yes — for structural work (pergolas, decks), utility connections (gas, electrical, plumbing), and fencing above a certain height. Requirements and timelines vary by municipality. A professional contractor handles the permitting process, and permits protect the homeowner by documenting that the work meets code, which matters for insurance and resale.
Does a complete outdoor living system increase home value?
The National Association of Realtors’ 2023 Remodeling Impact Report: Outdoor Features estimates 95 percent cost recovery at resale for a new concrete paver patio and finds that outdoor spaces consistently rank among the features buyers find most appealing. Beyond resale value, outdoor living improvements add functional square footage to a home at a fraction of the per-square-foot cost of an interior addition.
Can features be added to an outdoor space later?
Yes — as long as the original work was planned to accommodate future additions. The key is running utility stubs (gas, electrical conduit, low-voltage wire, plumbing) during the initial phase and designing the structural layout to accept future components. Adding a pergola to an existing patio is straightforward when the footings were pre-poured; adding an outdoor kitchen is straightforward when the gas and electrical lines were pre-run. The expensive scenario is retrofitting infrastructure under finished surfaces.
How long does a complete project take to build?
A single-phase complete project — ground surface, pergola, kitchen, lighting, and perimeter — typically takes four to eight weeks of active construction time after permits are secured, depending on scope and site conditions. Phased projects spread across months or years add permitting and mobilization time for each phase while spreading the investment.
What is the difference between landscape lighting and permanent lighting?
Landscape lighting uses low-voltage fixtures installed at ground level to illuminate trees, garden beds, walkways, and outdoor living areas. Permanent lighting uses individually addressable LED fixtures mounted along the home’s roofline to define the architectural silhouette and provide programmable color and brightness for holidays, events, and everyday ambiance. They are two separate systems that create one unified nighttime picture when designed together.
Is an architect required, or can a contractor design the space?
For most residential outdoor living projects, a contractor who specializes in outdoor living design can handle the planning and layout. An architect or landscape architect becomes valuable for significant grade changes, structural integration with the house (second-story decks, roofline connections), or complex zoning constraints. The critical question is not the title — it is whether the person designing the space thinks about the complete system rather than individual products.
Service areas
Backyard Paradiso designs and installs complete outdoor living systems across every market it serves. Each project begins with a site assessment that evaluates the property, the homeowner’s goals, and the local conditions that shape material selection and engineering specifications. Regional details are on the Markets We Serve page.
The best outdoor projects start with the whole picture
A site assessment covers the complete property — the sun path, the utility access, the grade, and the way the space actually gets used — and produces a design concept that accounts for every phase, whether everything is built now or spread over years. Consultations are available by appointment.